
Most Godot multiplayer tutorials create a peer-to-peer setup for simplicity’s sake. As your multiplayer gets more complex, you might want to create a dedicated server.
Advantages
- code seperate from client
- smaller filesize
- better performance
- better stability
- not affected by asset changes
- can use Godot headless (Linux only)
- can be automated
Scope
This tutorial will create a dedicated server with Godot’s high-level multiplayer API.
Also we will create a client to interface with the dedicated server. They will both be two seperate projects to show the speration of logic between the two.
We will develop and test both on the same machine, but you could also run the server on seperate server hardware.
The client will move an object, tell the position to the server, which will distribute the information to all other clients.
Let’s go!
Prequisites
- Godot 3.0.X (whatever is the most recent, patches don’t break the API)
Warning: If you are debugging server and client silmuntaneously, Godot’s debugger and console output won’t work. To see your
print()statments, you have to check the popup windows’ console.
Project Setup
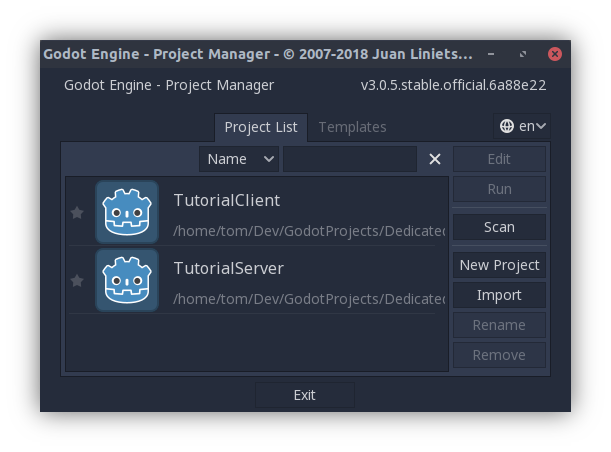
Create a client and a server project in Godot. The paths shown will depend on your OS the screenshot was made on Linux.
Server
Creating the server
Open your server project and add a Node of type “Node” to your scene. It could be any other type, but since spatial information is irrelevant for it, it might as well be just of type “Node”. Add to it a script, naming does not matter, I chose to name mine “tutorial_server.gd”.
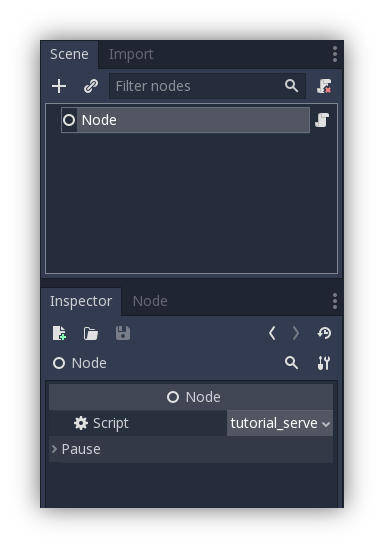
Save the scene, I chose “tutorial_server.tscn”, but you are free to choose your own.
The server will listen for connections as soon as it is started. Therfore we can place the creation of it in _ready() which gets called as soon as the script is loaded.
extends Node

const PORT        = 5000
const MAX_PLAYERS = 200

func _ready():
    var server = NetworkedMultiplayerENet.new()
    server.create_server(PORT, MAX_PLAYERS)
    get_tree().set_network_peer(server)
Hook up server events
The server will send events to which we can bind functions. They will be called if such an event will happen. Relevant events for the server are:
- network_peer_connected when a client connects to the server
- network_peer_disconnected when a client disconnects gracefully or after a client times out
You can call the functions something meaningful.
(...)

func _ready():
    get_tree().connect("network_peer_connected",    self, "_client_connected"   )
    get_tree().connect("network_peer_disconnected", self, "_client_disconnected")

    (...)
Create client representation
The server needs to have a representation of all clients on his part, yet they don’t need all the bells and whistles you’d have on a client. So it will be a stripped down version of a real client.
Create a new scene (Scene->New Scene). Before you can save it, you have to add a Node to it. Let’s choose the node type “Spatial” since the player will need to have a 3D representation on the server. Other games might need different types. The name of the node is not important since we will rename it when spawning anyway.
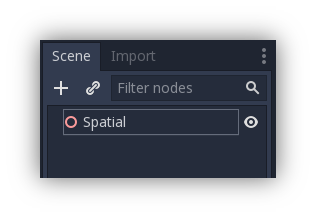
Save the scene as “remote_client.tscn”. Remember the name, we will need it when spawning client representations.
Spawn clients representation
Next, we will spawn clients as they connect to keep track of where they are.
Function naming has to be consistent with what we passed to the get_tree().connect(...) before.
The id of the client is different everytime one connects, even for the same computer.
func _client_connected(id):
print('Client ' + str(id) + ' connected to Server')
var newClient = load("res://remote_client.tscn").instance()
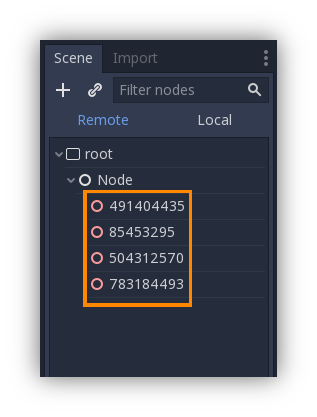
newClient.set_name(str(id)) # spawn players with their respective names
get_tree().get_root().add_child(newClient)Every client representation is named after the id of the connected client. Having multiple clients connected to server would look something like this:
Handle messages from clients
In order for clients to send messages to the server, the client representations on the server need to have scripts attached which handle RPC function calls.
For example, if a client wants to send the position of his player, it would have code like this:
    (...)
    # Server ID is always 1
    rpc(1, "_update_client_position", my_local_position)
    (...)
For the server to be able to recieve this funtion call it has to have a remote function:
remote func _update_client_position(new_position):
    # TODO assign new position to servers' client representation
    # TODO send new position to all other clients
Scene structures
Warning: In order to recieve the client messages, server and client scene structures need to be identical.
Since you cannot pass the rpc(...) function on what server node it should be called, it tries to call the function on a
node with the same path as it’s own (get_path()).
Example:
If the client node sending the rpc call has the node path: /root/lobby/12345678
The server node with the remote function needs to have the path /root/lobby/12345678
Summary
That’s the basics of how a dedicated server in Godot operates. Of course you have to make sure clients are deleted from the server when disconnecting etc. but this should give you the tools to write one yourself.
Resources
Background image by Manuel Geissinger
Tools
This post was created using:
- Godot 3.0.5
- Jekyll
- Gimp 2.10
- Linux / Ubuntu
- GitLab